Skye in five days: expectations vs reality
On our first map pass, Skye looked like a cluster of “quick stops” you could stitch together between lunch and sunset. Then we saw the drive times weren’t the problem—the roads were. Single-track sections, slow caravans, and the constant pull-offs for oncoming cars turn a “40-minute hop” into something that feels like a mini-journey, especially if you’re tense behind the wheel.
The reality: five full days is enough for the iconic views, but not if you try to sample every peninsula. The best days happened when we grouped sights tightly (one main area, one backup nearby) and treated anything “just over there” as optional. Weather also isn’t a footnote; it dictates whether a viewpoint is magical or a grey blur.
So the plan that works is less about cramming and more about choosing a base, limiting long cross-island drives, and building in one flexible day for rain and fatigue—because both arrive faster than you think.
Day 1: Arrive, base yourself, gentle viewpoints | Must: Old Man; Optional: Portree; Skip: detours
We landed with that familiar urge to “make the most of the day,” then watched it evaporate at the car-rental desk and again the first time an oncoming van appeared on a narrow stretch. Day 1 worked best when we treated it as a settling-in day: drive straight to your base (we liked staying north or near Portree for reach), check in, and accept that you’re not also “doing” the whole island before dinner. The calmer you are behind the wheel, the faster Skye feels.
The one must that still fits is the Old Man of Storr viewpoint: you get an iconic payoff without committing to an all-day hike, and you can turn around early if wind or drizzle makes the path miserable. Go later in the day if you can—morning crowds compress the parking and make nervous driving feel worse. Portree is a decent optional add for groceries and a simple meal, but it’s also where time slips away in queues and slow parking loops.
What we’d skip: detours “because it’s on the way.” On Skye, “on the way” often means single-track stress plus an arrival that’s too late to enjoy anything.
Day 2: Trotternish Loop highlights | Must: Quiraing; Optional: Kilt Rock; Skip: full loop
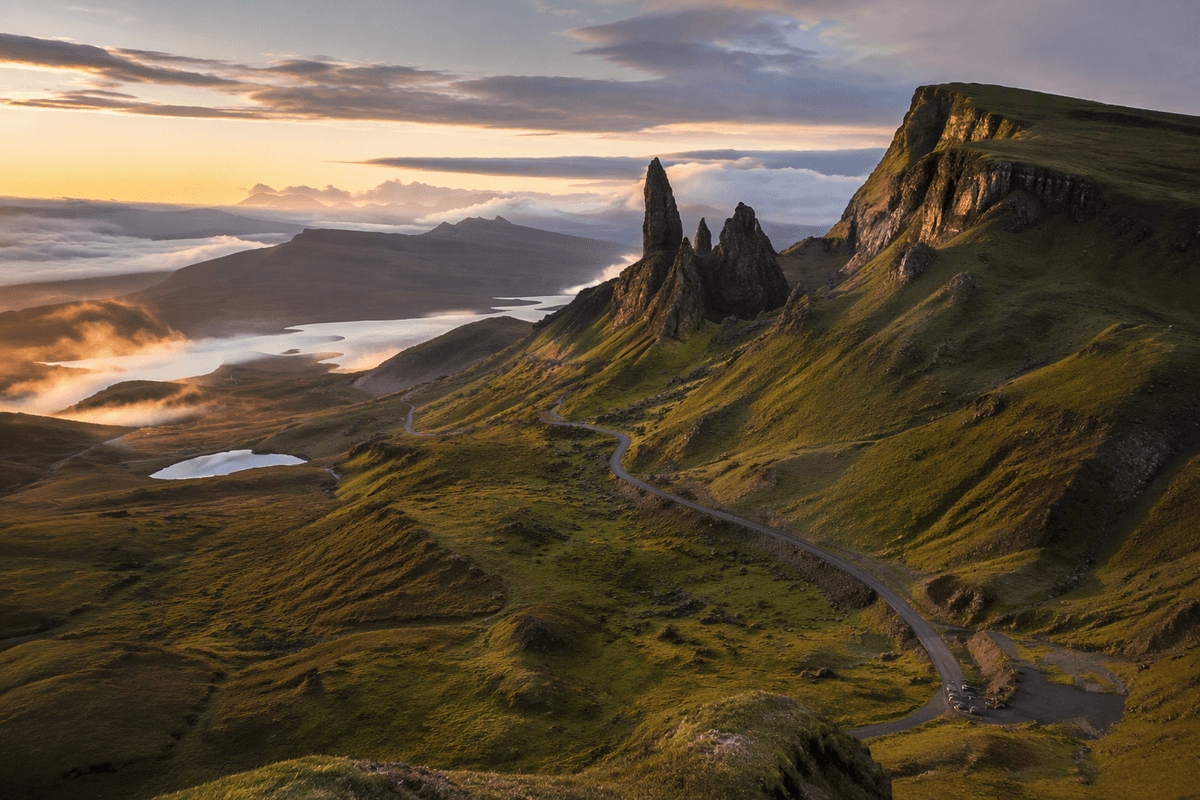
The Quiraing was the first place we felt the “start early” advice pay off: we rolled into the car park before the main wave and the road still felt manageable, even with passing places and that slight edge of exposure on the busier bits. If you’re nervous on single-track, this is a good morning to drive slowly on purpose—locals and tour traffic get less forgiving later, and it’s not the place you want to be learning your reversing skills under pressure.
On the ground, the smart move is treating the Quiraing as a flexible out-and-back rather than a heroic loop. The full circuit is brilliant when it’s dry and visibility is good, but wind and mud can turn it into a slog that eats your day (and your knees). We aimed for the classic viewpoints, then turned around once the footing started to feel more “work” than “wow,” and didn’t regret it.
If you still want another hit of coastline without committing to more walking, Kilt Rock works well as a quick, low-effort stop—just don’t assume it will be dramatic if the falls are thin or the mist is down. This is also where skipping the full Trotternish loop keeps the day from becoming a windshield marathon.
Day 3: Waterfalls and coastal walks | Must: Fairy Pools; Optional: Talisker Bay; Skip: long hikes
We hesitated on the Fairy Pools because it’s the kind of place that gets sold as “quick,” and then you find yourself still walking an hour later, trying to justify the drive. From Portree it’s a real chunk of time on slower roads toward Glenbrittle, so we treated it like a morning appointment: arrive early, park, walk to the first big pools and the main falls, and decide there—stay if the light is good and the water’s clear, bail if it’s crowded or raining sideways. In wet weather the path gets slick fast, and this is one of those walks where “just a little farther” can quietly turn into a damp, cold commitment.
After that, Talisker Bay is a strong optional reset, especially if you want coast without climbing. The road in can feel narrow in places, so it’s not the best add-on if you’re already tense from driving—pick it only if you’re still feeling steady and it’s not late. We liked it most as a short, windswept wander and a sit on the rocks, not a long beach march.
What we skipped on Day 3 were the longer “link-it-all” hikes nearby. Skye’s weather makes big coastal ambitions fragile, and keeping this day shorter left enough energy for dinner without that end-of-day single-track fatigue.
Day 4: South Skye and Sleat | Must: Armadale; Optional: beach stop; Skip: extra museums
By Day 4 we could feel the “single-track tax” accumulating, so we pointed the car south toward Sleat with one rule: no complicated loops, no squeezing in stops just because Google said they were nearby. Sleat feels calmer than the north, and the driving is generally less twitchy, but it’s still slow enough that a casual “we’ll do this on the way” can turn into a late afternoon crawl back to base.
Armadale was the must for us—not because it’s the flashiest scenery, but because it’s an easy, low-stress day that still feels like you’ve gone somewhere. If you do the gardens/castle grounds, it’s a contained walk with plenty of bail-out points if the wind picks up or you’re simply not in a “big hike” mood. The limitation is that it can feel a bit tame if you’re chasing only dramatic viewpoints, so it works best as a deliberate pacing day rather than a highlight hunt.
If the weather behaves, add a short beach stop on Sleat (even 30–45 minutes is enough). Just don’t force it in heavy rain: wet sand, sideways gusts, and damp layers are a fast way to make the whole day feel longer than it needs to.
What we skipped here were extra museums—worthwhile in theory, but in practice they turned into indoor “filler” that stole daylight without lowering the driving load.
Day 5: Bad weather buffers and departure | Must: Neist Point; Optional: distillery; Skip: last-minute drives

On Day 5 we kept checking the forecast like it was a negotiation: Neist Point is spectacular, but it’s also exposed, and the walk down feels longer on the way back up when the wind is pushing you sideways. We aimed to arrive late morning—early enough to dodge the tightest parking squeeze, late enough that the light wasn’t totally flat—and treated the lighthouse path as a “see how it feels” outing rather than a box to tick. If visibility collapses, it can go from cinematic to grey in minutes, so don’t anchor your whole departure day on a single viewpoint.
Our bad-weather buffer was simple: if Neist was borderline, we’d still drive out and decide in the car park, then pivot to a distillery visit for warmth and a fixed-time plan (great when rain turns “short stop” into misery). The constraint is that tastings and tours can lock you into a schedule, which is awkward if you’re also trying to return the car or catch a ferry—book only if your departure time is genuinely flexible.
What we skipped were last-minute “since we’re here” drives across the island. Skye’s roads don’t reward optimism on the final afternoon, and finishing calm beat squeezing in one more photo with a clock running.
Leave Skye: what you’ll remember and regret least
The last morning, we nearly talked ourselves into one more “quick” viewpoint, and then remembered how Skye time works: a 20-minute detour becomes 70 once you hit a slow convoy and have to wait your turn at passing places. What stuck with us wasn’t the extra stop we didn’t do—it was leaving without that clenched, end-of-trip driving tension, with enough margin to refill, return the car, and still breathe.
If you’re choosing what you’ll remember (and what you won’t miss), it’s the early Quiraing light, the first clear look toward Storr, and one good west-coast moment—Neist if it cooperates, or a warm indoor backup if it doesn’t. The regret-proof move is resisting the “full loop” mentality: Skye rewards depth in a few areas more than distance covered, especially if single-track roads already take more out of you than the hikes do.